So you want to publish an npm package. Cool. I've published three so far - devKick, styleSweeper, and processLogger - and honestly, it's not as complicated as I thought it would be. But there's definitely some stuff I wish I knew before I started. Let me walk you through what actually works.
Why Bother?
It's always best to explore new things. Publishing to npm was the next platform I wanted to try.
What We Built
Before we get into the how, here's what I actually shipped:
- devKick - A CLI tool that checks your environment and helps kickstart projects. Helps you kick start a development environment you might not be comfortable with.
- styleSweeper - Scans your HTML/JSX files to find inline styles. I built this because I kept forgetting where I left random style attributes. It also helps junior developers identify and refactor inline styles, which is generally considered a bad practice.
- processLogger - Lists running processes by category. This one was an accident - I was trying to build something else and ended up with this instead.
Setting Up Your Project
First thing: create a folder and run npm init. Answer the questions (or just hit enter a bunch of times, I won't judge). The important fields are:
- name - This is what people will type to install it. Make sure it's not taken. Check npm first.
- version - Start with 1.0.0. Use semantic versioning (major.minor.patch).
- main - This is your entry point. Usually
index.jsorsrc/index.js. - bin - If it's a CLI tool, this is where you put the command name and path to your executable.
Here's what my package.json looks like for devKick:
{
  "name": "devkick",
  "version": "1.0.0",
  "description": "Colorful CLI tool for developers",
  "main": "index.js",
  "bin": {
    "devkick": "./index.js"
  },
  "scripts": {
    "test": "echo \"Error: no test specified\" && exit 1"
  },
  "keywords": ["cli", "developer", "tools"],
  "author": "Joshua Paulsen",
  "license": "MIT"
}
Writing the Code
This part is... just write your code. Put it in whatever file structure makes sense. For CLI tools, I usually have:
index.js- The main entry pointlib/- Actual logic goes hereREADME.md- Documentation (people actually read this, surprisingly)
For CLI tools, don't forget the shebang at the top of your main file:
#!/usr/bin/env node

// Your code here
And make sure your bin file is executable. Run chmod +x index.js on Mac/Linux. Windows... I am not sure, not an expert there.
devKick in Action
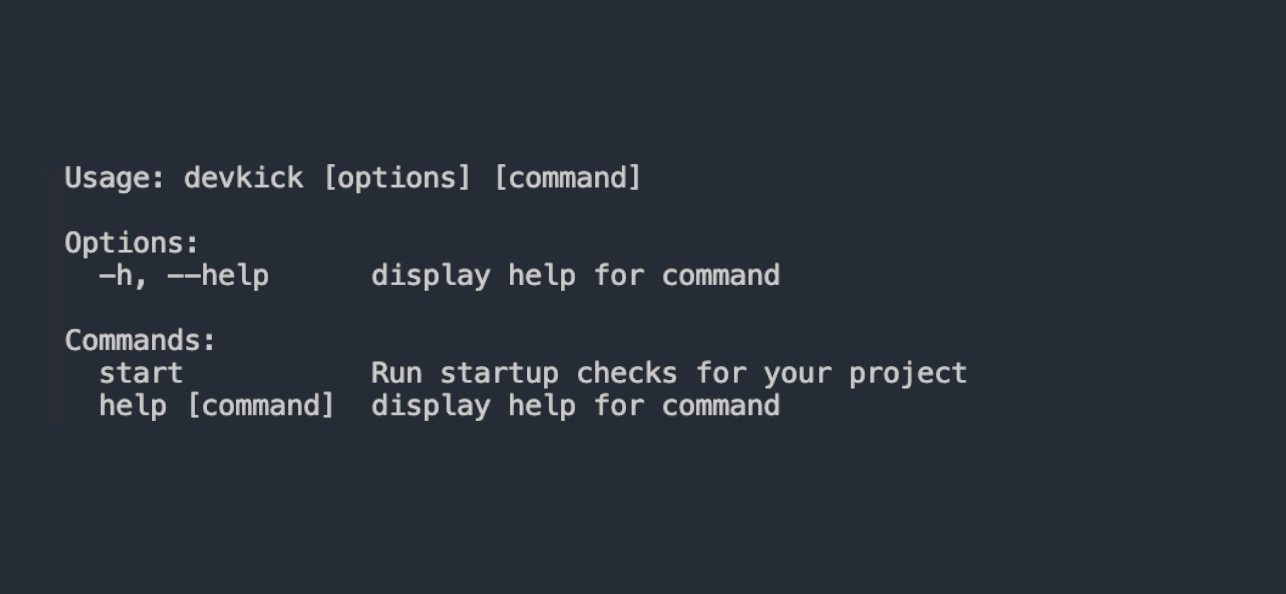
devKick - kick starting your environment
Testing Locally
Before you publish, test it locally. Use npm link:
# In your package directory
npm link

# In another project
npm link your-package-name

# Now test it
This creates a symlink so you can use your package like it's already published. Super useful for catching bugs before they go live.
styleSweeper Finding Inline Styles
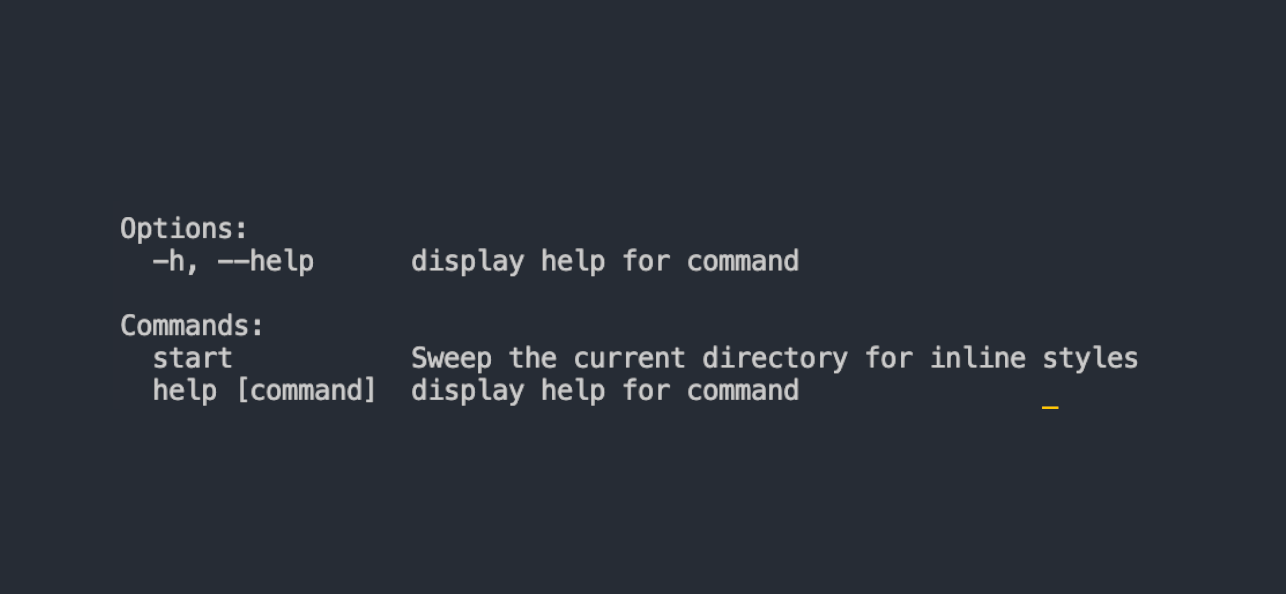
styleSweeper scanning files and reporting inline styles. It's not fancy, but it works.
Publishing to NPM
Alright, here's the part that actually matters. First, make sure you have an npm account. If you don't, go make one. Then run npm login in your terminal.
Before you publish, double-check:
- Your package name isn't taken (check npmjs.com)
- Your version number is correct
- You have a README.md (seriously, do this)
- You've tested it locally
Then just run:
npm publish
That's it. If it works, congrats. If it doesn't, npm will tell you why. Usually it's because the name is taken or you're not logged in.
For scoped packages (like @yourname/package), you need to publish with npm publish --access publicunless you have a paid npm account. I don't, so I just use regular names.
processLogger Showing Running Processes
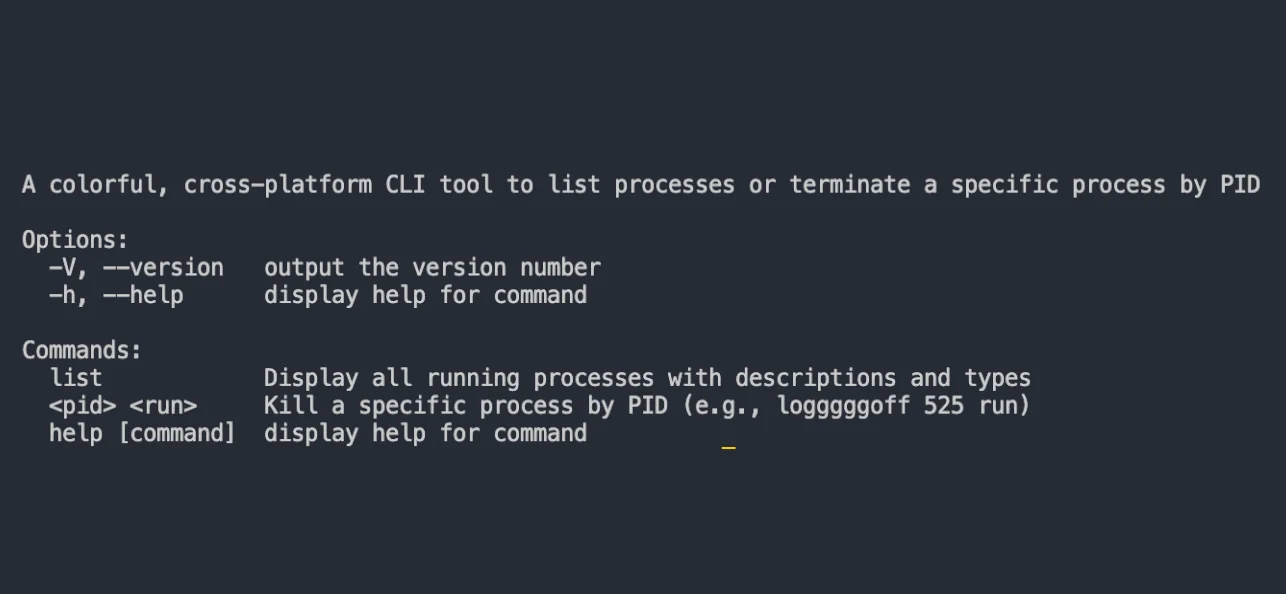
processLogger categorizing processes. This was supposed to be something else, but here we are.
Updating Your Package
So you found a bug. Or you want to add a feature. Here's what you do:
- Fix the code
- Update the version in package.json (use
npm version patchfor bug fixes,npm version minorfor new features,npm version majorfor breaking changes) - Run
npm publishagain
That's it. The version bump is important - npm won't let you publish the same version twice. Which makes sense, I guess.
Things I Wish I Knew
- .npmignore - Like .gitignore but for npm. Use it to exclude stuff like tests, config files, etc. If you don't have one, npm uses .gitignore by default, which is usually fine.
- README matters - People actually read it. Put installation instructions, basic usage, and examples. Don't be lazy here.
- Keywords help - Add relevant keywords to your package.json. Helps people find your package when searching.
- Don't overthink it - Your first version doesn't need to be perfect. Just make it work. You can always update it later.
Common Mistakes
Here's what I messed up:
- Forgot the shebang in CLI tools - won't work without it
- Used a name that was already taken - had to rename everything
- Forgot to update the version - npm rejected my publish
- Didn't write a README - got confused emails asking how to use it
Check Out Our Packages
If you want to see real examples, check out our packages:
Look at the code, see how we structured things. Steal whatever you want. That's how open source works.
Final Thoughts
Publishing npm packages isn't rocket science. It's mostly just: write code, test it, publish it. The hard part is writing code that's actually useful. But if you're solving your own problems, chances are someone else has the same problem too.
Don't wait until it's perfect. Just ship it. You can always fix it later. I've updated all three of my packages multiple times already. That's the whole point of versioning.
Good luck. And if you build something cool, let me know. I might actually use it.